PURPOSE
In this post, I’ll walk through how I setup my WSL (Windows Subsystem for Linux) so I can edit/create Posts for this blog without have to wait around for direct changes to the Github repo and waiting for updates. If you need to make minor changes or if you want to quickly see and change styles, formatting, layout etc. this is a great way to quickly do that. I have collected these steps through several sources and will link them for your reference.
This is where I began: Scott Dorman’s Blog
This was also referenced: Jekyll Requirements and Jekyll on Ubuntu
WALKTHROUGH
Before you start, you’ll need to go through the normal update process for your Ubuntu subsystem. This is my subsystem:
- Distributor ID: Ubuntu
- Description: Ubuntu 18.04.4 LTS
- Release: 18.04
- Codename: bionic
You’ll also need to have a few things done prior to all of this, none of which I’ll cover in this walkthrough. You’ll obviously need to have a jekyll site already up and running. I use GitHub Pages and if you don’t know about this, I suggest you check it out. It’s awesome. I also use Visual Studio Code as my editor. I use this for work and love it, your mileage may vary so use whatever makes you happy. Also, be sure to have your code cloned locally from your repo of choice. Now that all of that is out of the way, lets get to it.
First things first, prepare for Jekyll and install a few programs in your subsystem:
-
Install MAKE, GCC and G++:
sudo apt-get install make gcc g++ -
Install Ruby and Dev tools:
sudo apt-get install ruby-full build-essential zlib1g-dev ruby-dev -
Add environment variables:
echo '# Install Ruby Gems to ~/gems' >> ~/.bashrc echo 'export GEM_HOME="$HOME/gems"' >> ~/.bashrc echo 'export PATH="$HOME/gems/bin:$PATH"' >> ~/.bashrc source ~/.bashrc -
Install Jekyll:
sudo gem install jekyll bundler -
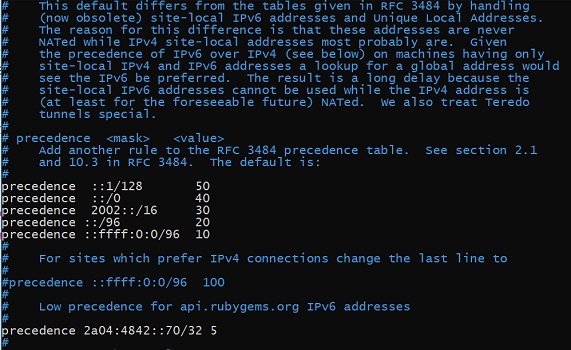
Edit /etc/gai.conf to fix Ruby ipv6 issues
sudo nano /etc/gai.conf- This is what it should look like:

-
Now install Bundler:
sudo gem install bundler -
Change directories to your repo and add these to your Gemfile
source 'https://rubygems.org' gem 'github-pages', group: :jekyll_plugins -
Now we need to bundle:
bundle install -
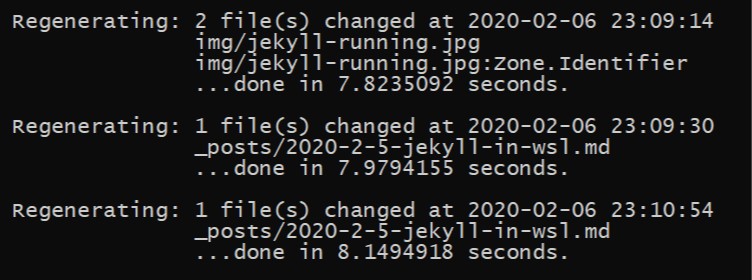
Now it’s time to run Jekyll. Make sure you’re in the root of your repo:
bundle exec jekyll serve --watch- It should look something like this:

CONCLUSION
If all went well, you should see your site being regenerated each time you save your changes.

Could you have just as easily installed Ruby on Windows? Sure. However, this is way more fun! Also, to easily transfer files between Windows and WSL, from inside WSL simply type the below and the file system opens in a file explorer window. Enjoy!
explorer.exe .
Photo by Luca Bravo on Unsplash
Comments